The One-Coat Painting Mistake and What I Do Instead Now
The thrifted nightstand felt like a small win right away. It was sturdy, the drawer still slid smoothly, and the shape had that kind of old-school charm that becomes cute the moment you stop focusing on the scuffs and start picturing fresh paint. As usual, the kitchen floor took on multiple roles at once, part…
The thrifted nightstand felt like a small win right away. It was sturdy, the drawer still slid smoothly, and the shape had that kind of old-school charm that becomes cute the moment you stop focusing on the scuffs and start picturing fresh paint.
As usual, the kitchen floor took on multiple roles at once, part workshop, part photo studio, and occasionally the place where cereal gets eaten from a mug while life planning is postponed indefinitely.
That’s where the crucial decision happened. One coat felt efficient. One coat felt optimistic. One coat was absolutely not enough. The finish came out thick, uneven, and unmistakably orange-peel textured, the kind of result that announces impatience immediately.
This is the part that matters, and the part that saves future frustration: shortcuts in paint projects rarely behave like shortcuts. Skipping the second coat doesn’t save time, it just creates a mess that has to be fixed later.
What Orange Peel Paint Texture Looks Like and Why It Happens
Orange peel texture is that slightly raised, dimpled surface you can see and feel. It usually happens when paint cannot level out before it starts drying, which is common on furniture because we often work indoors, move too fast, or use tools that leave texture behind.
The most common causes are using paint too thickly, rolling or brushing with too much pressure, going back over paint that has started to set, or using a roller that is meant for walls rather than smooth furniture surfaces.
In my case, I basically stacked the odds against myself because I used too much paint in one pass, I tried to “even it out” by going back over areas that were already drying. I also used a tool that was not helping me get a smooth finish on the flat surfaces of a nightstand top and drawer front.
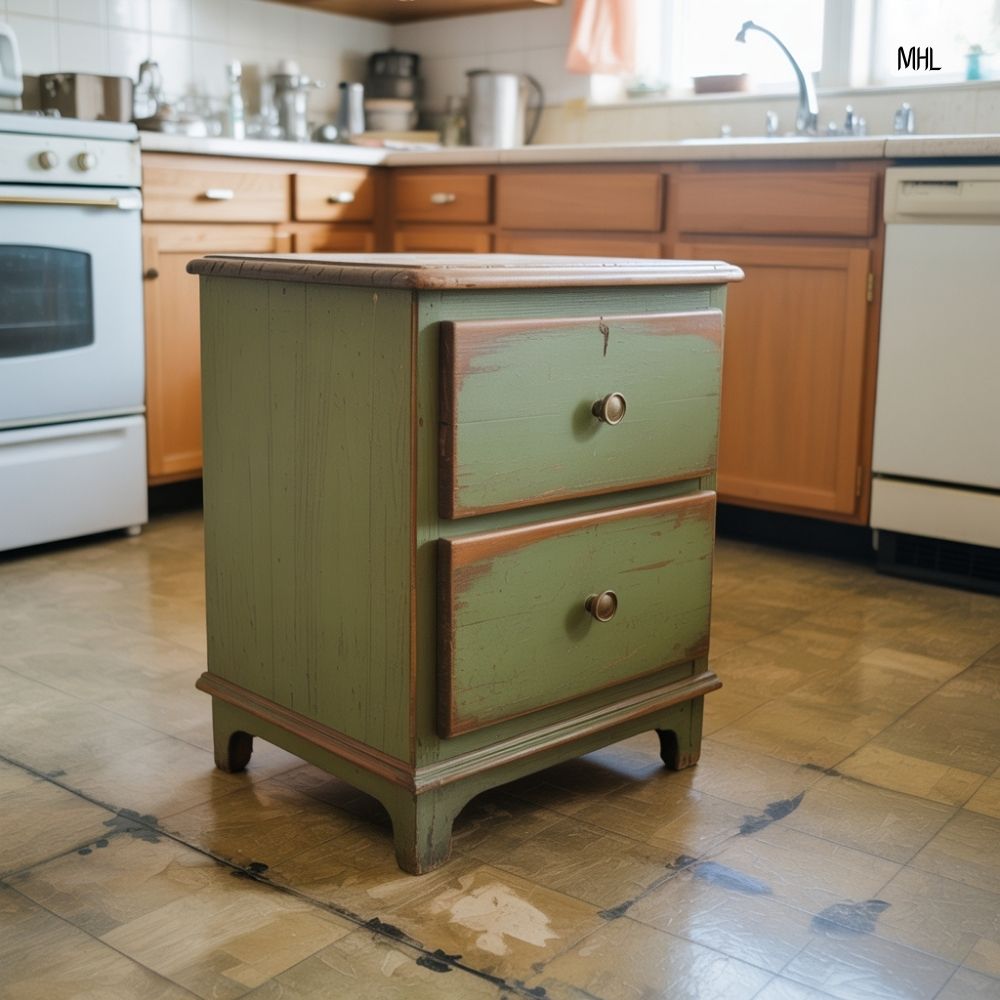
The Nightstand Before I Started
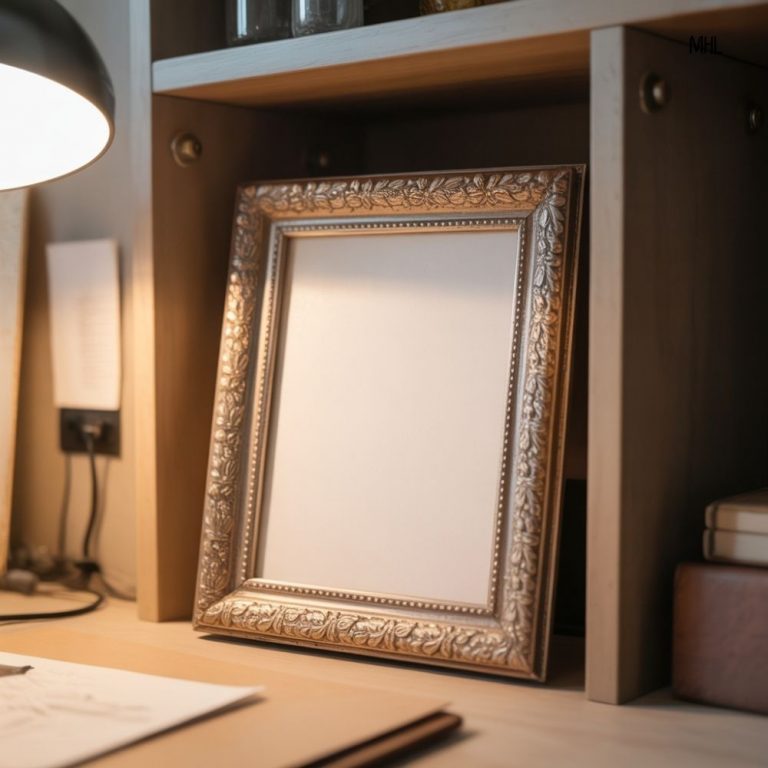
My goal was a smooth, modern finish that looked like the kind of nightstand you’d see styled with a little lamp and a stack of books, not something that screamed “I panicked and painted this in my kitchen at night,” even though that is exactly what happened.
What I Used
For this project, I used basic supplies that are easy to keep on hand for thrift flips, and I’m listing them here so you can see what actually mattered in the final result.
Tools and Materials
- Mild dish soap and warm water
- Clean rag or sponge
- Deglosser (optional) or a sanding sponge for prep
- 220 grit sandpaper (the hero of the fix)
- Sanding block (helpful for even pressure)
- Tack cloth or a slightly damp microfiber cloth
- Painter’s tape
- Bonding primer (especially important for glossy finishes)
- Furniture paint or a good enamel paint
- Smooth foam roller (small size for furniture)
- Small angled brush for corners and detail areas
- Paint tray or disposable plate
- Drop cloth or cardboard to protect the floor
Step 1: Clean It Like It Has Secrets
Before any paint goes on thrifted furniture, I clean it thoroughly, because thrifted pieces are usually a combination of dust, hand oils, and mystery residue that you do not want trapped under primer.
I washed the entire nightstand with warm water and dish soap, wiped it down again with clean water so I wasn’t leaving soap behind, and then let it dry completely.
If you ever wonder why your paint looks uneven or peels later, this step is often the reason, and it’s also the easiest step to do correctly, which is why it hurts so much when we skip it.
Step 2: Prep the Surface So Paint Can Actually Stick
Because the nightstand had a glossy finish, I needed to dull that shine so primer could grip properly, which you can do with a deglosser or with light scuff sanding. I didn’t sand to remove the finish, and I didn’t sand aggressively, because the goal is to create a slightly rough surface that helps everything bond.
Once the surface looked less shiny, I wiped away all dust with a tack cloth, because sanding dust left behind can create its own gritty texture, which is a very annoying way to sabotage your future self.
Step 3: Prime First, Even If You Want to Skip It
I used a bonding primer in a thin, even coat, which is crucial for thrifted furniture because it blocks stains, helps paint adhere, and provides a consistent surface to work with.
I let the primer dry fully, not just “dry to the touch,” because furniture layers behave better when they have time to cure. Rushing this step can make your paint drag or dry unevenly, which invites texture issues.
This is where my confidence was still high, and everything looked fine, which is usually the calm before I do something questionable.
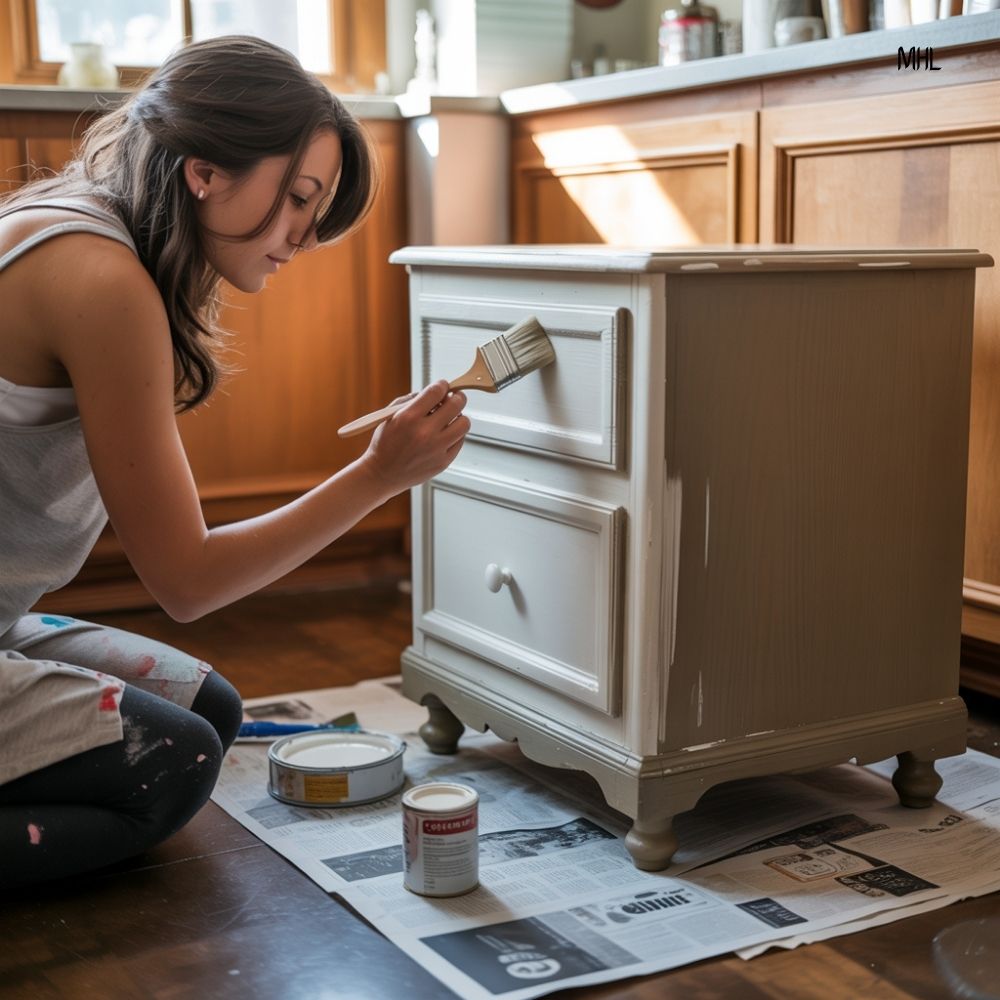
Step 4: Here’s the Part I Messed Up, So You Don’t Have To
I decided I could cover everything with one thick coat of paint, and I told myself it would save time, which sounds logical until you remember that thick paint takes longer to dry and is more likely to texture because it cannot level out.
I also used a roller that wasn’t giving me the smooth finish I wanted. Then I made the classic mistake of going back over spots that looked uneven while they were drying, which made the texture worse because the roller was pulling at paint that had started to set.
When it dried, the surface had an all-over bumpy look that reminded people of orange peel. The worst part was that it could look almost okay from a distance, but up close, it looked messy and felt rough, which was not the vibe for something you were going to touch every day.
The Exact Fix That Saved My Nightstand
This fix works because you are leveling the texture instead of fighting it with more paint, and the key is that you need patience for the drying stage and restraint during sanding, which are two things I do not naturally have, but I can borrow them when necessary.
Fix Step 1: Let It Dry Fully Before Touching It
I let the paint dry until it felt firm and no longer tacky, because sanding paint that is still soft will gum up your sandpaper and create new problems, and it can also cause the surface to tear or peel in a way that looks worse than the original texture.
If you are unsure, giving it extra time is always the smarter move, because furniture is a long game even when your brain wants it to be a quick craft.
Fix Step 2: Sand With 220 Grit for 90 Seconds
I used 220 grit sandpaper and sanded the textured areas for 90 seconds, focusing on smoothing the surface rather than removing paint, and that time limit matters because it keeps you from going too far.
I applied light, even pressure, used small circular motions to level the bumps, and then finished with a few gentle passes in one direction so the surface felt consistent.
You can absolutely use a sanding block here because it helps keep the pressure even, and the moment you feel the texture start to soften, you will understand why this step is so satisfying.
Fix Step 3: Remove All Sanding Dust
After sanding, I wiped everything down carefully with a tack cloth so no dust was left behind, because dust trapped under paint will show up as gritty texture, and you will feel personally victimized by it when you see it in the light the next morning.
Fix Step 4: Switch to a Smooth Foam Roller and Apply Two Thin Coats
This is the part that made the finish look clean and professional, because a foam roller lays paint down more smoothly on flat furniture surfaces, especially when you load it lightly and use gentle pressure.
I poured a small amount of paint into a tray, rolled the foam roller until it was evenly coated but not dripping, and applied the paint in long, controlled strokes, then I left it alone instead of chasing tiny imperfections while it was drying.
For corners, edges, and detail areas, I used a small angled brush, but I kept the brushwork minimal, and I lightly rolled over the larger flat sections to blend everything before it started setting, which helped the finish look consistent.
I let the first thin coat dry fully, then repeated the same process for the second coat, and the difference between the thick one-coat attempt and the calm two-coat method was honestly dramatic.
Quick Troubleshooting If Orange Peel Keeps Happening
If you keep seeing texture even after switching tools and doing thin coats, it usually comes down to technique, paint thickness, or room conditions, and you can adjust without buying a whole new set of products.
If your roller is leaving texture, make sure it is a smooth foam roller rather than a fuzzy nap roller meant for walls, because wall rollers are great for coverage but not great for sleek furniture finishes.
If your paint feels very thick, stirring it thoroughly and applying lighter coats can help, and you also want to avoid pressing down hard, because pressure pushes roller texture into the surface and encourages that pebbled look.
Room temperature matters too, because very hot or very dry conditions can make paint dry too quickly to level, so slowing down and keeping coats thin becomes even more important in those situations.
The Fast Recap So You Can Copy the Fix
If you only remember one thing, remember this: orange peel texture is usually caused by paint that is too thick and drying before it levels out, and the easiest save is leveling the texture with light sanding and repainting with thin coats using a smooth roller.
Sand with 220 grit for 90 seconds, wipe away dust completely, then apply two thin coats with a foam roller, letting each coat dry fully, and you will almost always end up with a smooth, clean finish that looks the way you pictured it when you brought that nightstand home.