The Day I Felt Broke and Made Something Cute Out of Literal Trash
I had one of those days where money felt loud, because everything small suddenly felt expensive, and that kind of pressure sneaks into your body in a way you don’t notice until you’re standing in your kitchen staring at a nearly empty bottle of dish soap like it’s a personal insult. My brain started doing…
I had one of those days where money felt loud, because everything small suddenly felt expensive, and that kind of pressure sneaks into your body in a way you don’t notice until you’re standing in your kitchen staring at a nearly empty bottle of dish soap like it’s a personal insult.
My brain started doing that rude math, the kind where you add up groceries, bills, and the little extras that make life feel normal, and the total makes you want to sit down on the floor and stare at nothing for a minute.
I kept trying to shake it off by doing other tasks, but the feeling followed me, because that’s how it works. At some point, I opened my recycling bin to toss an egg carton and a piece of cardboard and I though,t “If I can turn this into something cute, maybe I can remind myself I’m not powerless.”
So I made something pretty out of literal trash, and it didn’t fix my bank account, but it did fix my mood enough to breathe, which is sometimes the first step.
Resourcefulness is not embarrassing; it’s a skill, and it’s a real kind of abundance.
The Moment I Realized I Needed a Win That Didn’t Cost Anything
When I feel financially squeezed, my brain gets weirdly perfectionist, like it wants to control something to make up for what it can’t control, and that’s when I start thinking I shouldn’t start anything unless I can do it “right.”
It’s a trap, because then I do nothing, and doing nothing makes me feel worse, and then I scroll online and watch other people make their lives look effortless, and suddenly I feel broke and behind, which is a terrible combo.
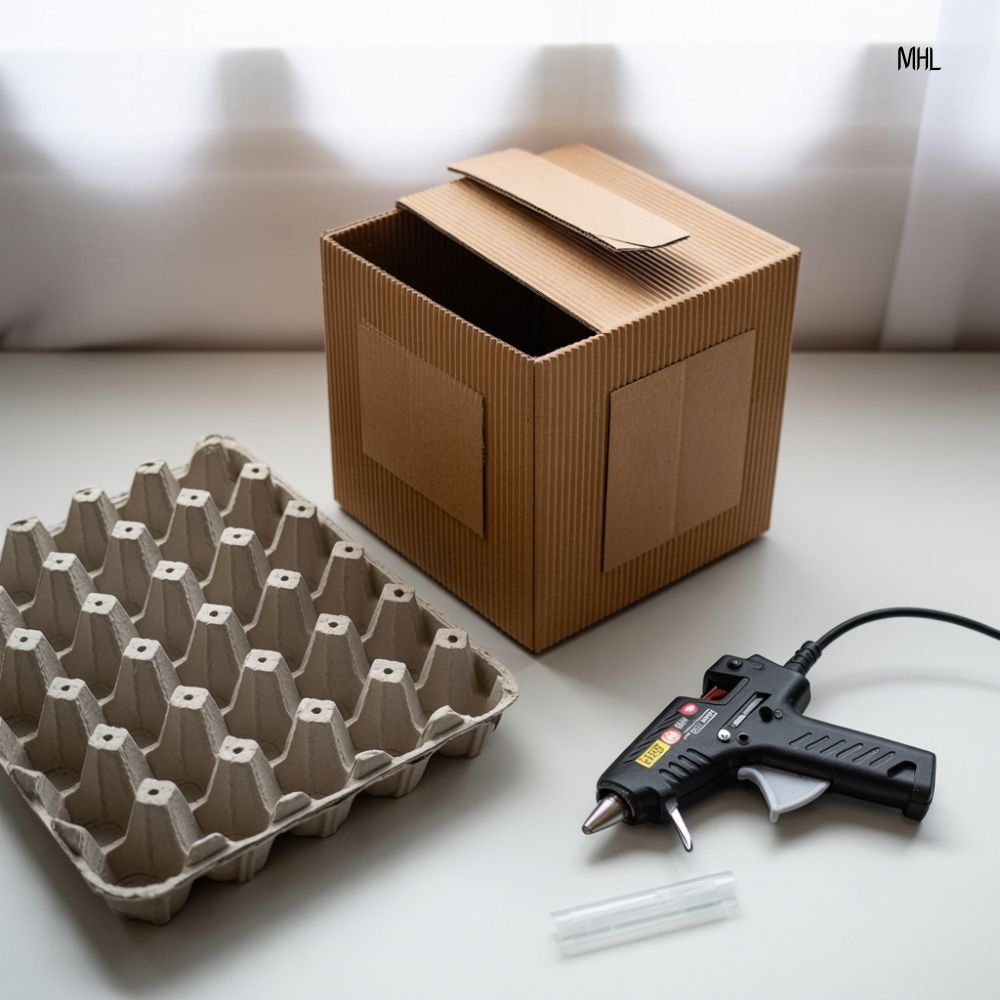
That afternoon, I decided to pick a project that matched my reality instead of my fantasy, and my reality was a cardboard box, an egg carton, a hot glue gun, and the stubborn belief that I can still make something nice with what’s already here.
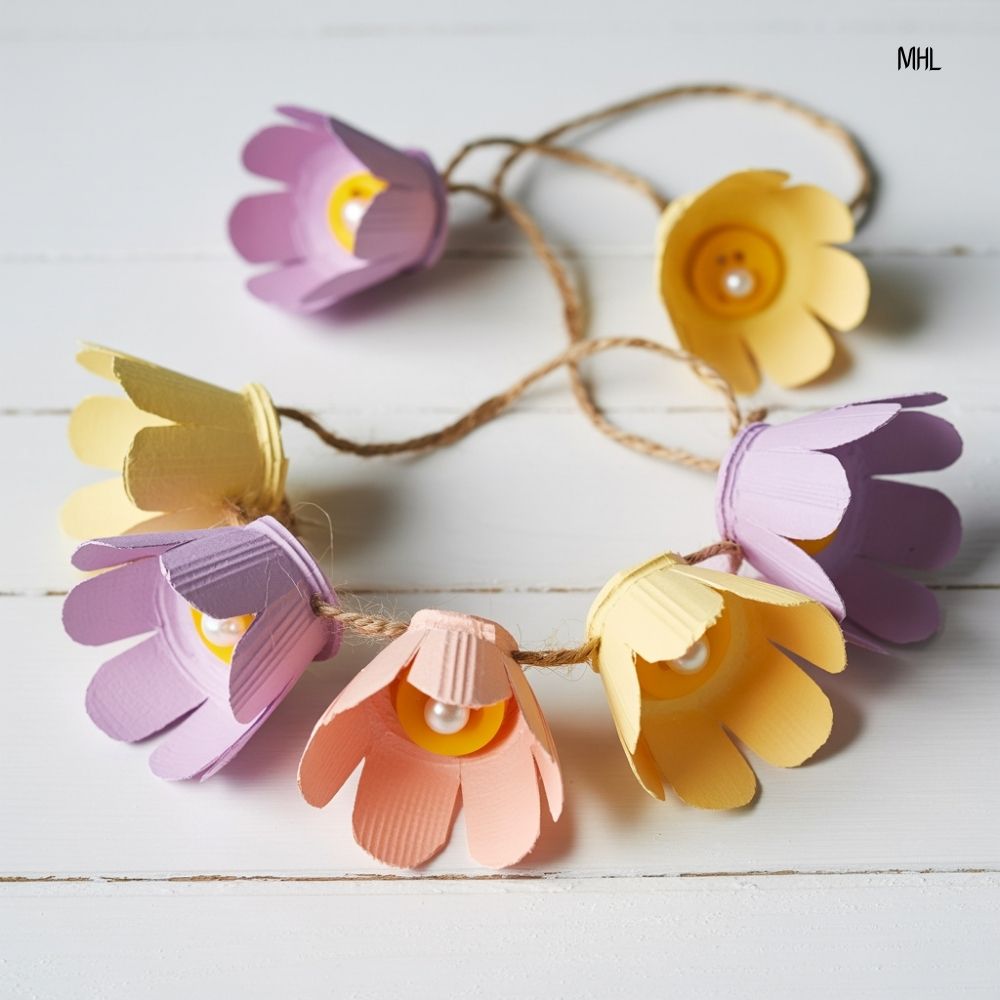
What I Made: An Egg Carton Flower Garland That Looks Shockingly Cute
I’ve seen egg carton flowers online before and always assumed they would look like crafts for a school hallway, but I was wrong in the best way. If you cut them neatly and paint them softly, they can look charming and vintage, like little paper blooms.
I turned mine into a small garland that I could hang over a shelf, and the point wasn’t perfection; the point was using my hands to make something lighthearted when my brain was trying to be heavy.
If you don’t want a garland, these flowers also work as fridge magnets, gift toppers, wall clusters, or little picks you can put in a plant pot, so the same steps can give you a bunch of options.
What I Used
Materials
- An egg carton (the paper pulp kind works best)
- Cardboard (from a shipping box or cereal box)
- Scissors
- Hot glue gun and glue sticks
- Paint (acrylic, craft paint, or even leftover wall sample paint)
- Paintbrush
- Pencil
- Twine, string, or yarn
- Optional: a button, bead, or rolled paper for flower centers
- Optional: a black marker for tiny details
Step 1: Cut the Egg Carton “Cups”
I started by cutting the egg carton into individual cups, then trimming the jagged edges so each cup looked like a rough little bowl. From there, I cut petal shapes around the top edge by making small curved snips, and I tried to keep the petals roughly the same size.
I cut the petals too thin and too pointy, and the whole thing looked spiky and sad, like a flower that was mad at me, so I switched to wider, rounder petals, and suddenly it looked softer and more natural.
If you want an easy guideline, I aim for five to eight petals per flower, with rounded tops, and I trim a little at a time because you can always cut more but you can’t un-cut.
Step 2: Make a Simple Cardboard Base for Structure
Because egg carton flowers are light but slightly flimsy, I used a little cardboard circle as a base for each flower, and this step is optional, but it helps everything feel sturdier, especially for a garland.
I traced a coin on cardboard, cut out small circles, then hot glued the bottom of my flower onto the circle, and it immediately felt more stable in my hands.
I also liked the symbolism of it, because the cardboard base was a literal support, and that’s what I was trying to build emotionally too, which was a small support system for a day that felt shaky.
Step 3: Paint Them Softly
I painted the flowers with acrylic paint, and I kept the coats light. I did one thin coat, let it dry, then did a second thin coat only where it needed coverage, and that second coat is what made them look finished without looking thick.
If you want them to look less “crafty,” choosing softer colors helps. On one flower, I dry-brushed a slightly darker shade on the petal edges. It gave that subtle vintage depth that made me feel like I knew what I was doing, which is always a nice feeling.
This step carried the message along for me, because it reminded me that “resourceful” doesn’t mean “cheap-looking,” and the difference is often just patience and light layers.
Step 4: Add Centers
For the centers, I used what I had, which was a small bead on one, a button on another, and on a few I rolled a tiny strip of cardboard into a spiral and glued it in the middle.
If you want a simple trick that looks cute fast, you can crumple a small piece of brown paper bag into a little ball, dab it with paint, and glue it in the center, and it looks surprisingly like a textured flower middle.
If you want a more delicate look, you can draw tiny dots with a marker once the paint dries, because small details are what make trash crafts look like decor.
Step 5: Turn It Into a Garland Without Getting Tangled
To make the garland, I laid my string out on the table first and decided where I wanted each flower to sit, spacing them about 5 to 7 inches apart, because too close makes it look crowded and too far makes it look sparse.
Then I flipped each flower over and added a line of hot glue to the cardboard base, pressed it onto the string, and held it there for 10 seconds so it set.
The first time I tried this, I glued the flowers while the string was loose and curling, and everything ended up crooked, so this time I taped the string ends to the table first to keep it straight, and that one small move made the whole garland look more even.
If you want extra security, you can glue a second small cardboard circle on top of the string on the back, like a sandwich, but I didn’t need it because the flowers were light and the glue held well.
The Message That Stayed With Me While the Glue Was Drying
When I felt broke that day, what I really felt was limited, like my options were shrinking, and making something out of trash pushed back against that feeling in a simple, stubborn way. It didn’t change the numbers in my bank account, but it changed the story in my head,
Resourcefulness is a real skill, and it’s one of the most practical forms of confidence you can build, because it teaches you that you’re not waiting for the perfect moment, the perfect budget, or the perfect supplies to begin.
You can begin with what you have, you can make it better as you go, and you can let small, handmade wins carry you through days that feel heavy.
Here’s what I want you to remember if you’re having a broke day too: you are not your budget, and you are not powerless just because you’re being careful with money, because creativity is still available to you, and it can be a tiny kind of abundance you can touch.
Your Turn
Tell me the most ridiculous thing you’ve ever saved “because it could be useful,” because I want to feel less alone, and also because I am absolutely the person who will keep a cardboard box for three months and then feel proud when it becomes decor.